There’s plenty of articles out there on the equipment needed for starting your own podcast but it’s always good to know what equipment your favorite podcast uses. In the beginning, The Cloudcast graciously taught me their tools and process, but we’ve carved our own path at this point. The one piece of advice I can give is that you need to invest in quality equipment early on. We made the mistake here at Bourbon Pursuit by only buying a simple Blue Yeti microphone and huddling around it. It was a mistake and the audio quality shows. We probably lost a lot of listeners because of it. If you like our audio today, it’s because we finally invested in making quality the first priority. We’ve also done several generations of upgrades in equipment to get bigger and better.
Prices listed are those at the time of this writing. So let’s get started!
We do all kinds of recordings. We will record on location but we also have guests not in our area so it’s done remotely. We’re also unique in that we do a combination of both Audio and Video podcasts. So the software we use may be overkill for you. I’ll give suggestions for you to use if you’re audio only.
On-Site/On-Location
Audio Recording Equipment
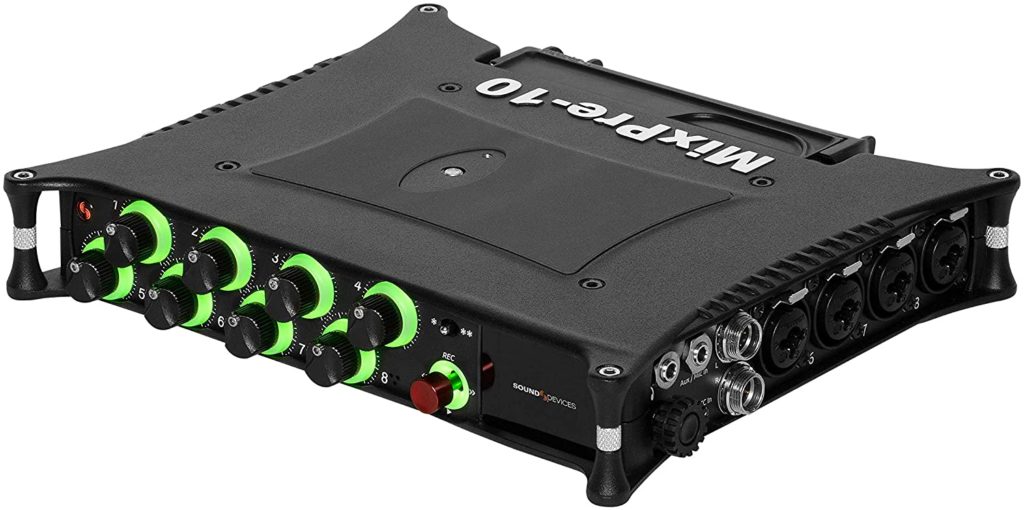
- Sound Devices MixPre-10 II with MixAssist – $1525.00 + $99 plugin
- Zoom H6 Six-Track Portable Recorder
 – $299.99 (OLD WE NO LONGER USE THIS)
 - Audio-Technica ATR2100-USB Cardioid Dynamic USB/XLR Microphone – $64.00 (OLD WE NO LONGER USE THESE)
- On Stage Foam Ball-Type Mic Windscreen, Black – $2.95 (OLD WE NO LONGER USE THESE)
- Shure Sm7b – $400
- Cloudlifter CL-1 – $150 (OLD WE NO LONGER USE THESE)
- Scissor Boom Arm – Ranges from $12-$100. Choose best for you.
- 2x Canare L-4E6S, Star Quad Balanced Male to Female Microphone Cables with Amphenol AX3M & AX3F Silver XLR Connectors – $35
- ART HeadAMP4 Eight Output Stereo Headphone Amplifier – $80
- JVC HARX500 Full-Size Headphones – $25
- Hamilton Nu-Era Tabletop Mic Stand with Bag and Mic Clip – $14.95
- 32GB or larger SD Card for recording from Zoom H6. We use Sandisk Ultra 64 GB – MicroSDXC UHS-I (SDSQUNC-064G-AN6IA) – $24.46 (OLD WE NO LONGER USE THESE)
- SanDisk 64GB Extreme SDXC UHS-I Card – C10, U3, V30, 4K UHD, SD Card – SDSDXV6-064G-GNCIN for MixPre-10 II. Verified Compatible – $16
- SanDisk 64GB Cruzer Fit USB 2.0 Flash Drive – SDCZ33-064G-G35 for MixPre-10 II. Verified Compatible – $11
 We up
We up![]() graded from a Zoom H6 to a Sound Devices MixPre-10 II when we had extra budget. We never had a problem with the Zoom H6, but I looked at it as an opportunity to move to production grade equipment. The Kashmir pre-amps would negate the need for the Cloudlifters for the Shure Sm7b mics, meaning we have less equipment to pack. Even though we will likely never record with 8 XLR inputs, it’s great to have that flexibility. The biggest seller for me was recording in 32-bit float. On the Zoom H6, if someone has a really loud laugh I look like a DJ turning knobs and the audio peaks and ends up distorted. Now with 32-bit float, that will never happen. I am also a fan of saved pre-sets for different microphones, levels, inputs, and output settings when we record in person, whiskey quickies, or when it’s connected to a laptop. To make post-production easier on Whiskey Quickies, we added the MixAssist plugin because it will do all it’s magic on the L/R channels while keeping the isolated tracks untouched. We use the isolated tracks for individual tracks in post-production but the MixAssist cleans up our lavalier recordings easily. I also like the USB backup so I don’t need to pop-out the SD card and we have a backup.
graded from a Zoom H6 to a Sound Devices MixPre-10 II when we had extra budget. We never had a problem with the Zoom H6, but I looked at it as an opportunity to move to production grade equipment. The Kashmir pre-amps would negate the need for the Cloudlifters for the Shure Sm7b mics, meaning we have less equipment to pack. Even though we will likely never record with 8 XLR inputs, it’s great to have that flexibility. The biggest seller for me was recording in 32-bit float. On the Zoom H6, if someone has a really loud laugh I look like a DJ turning knobs and the audio peaks and ends up distorted. Now with 32-bit float, that will never happen. I am also a fan of saved pre-sets for different microphones, levels, inputs, and output settings when we record in person, whiskey quickies, or when it’s connected to a laptop. To make post-production easier on Whiskey Quickies, we added the MixAssist plugin because it will do all it’s magic on the L/R channels while keeping the isolated tracks untouched. We use the isolated tracks for individual tracks in post-production but the MixAssist cleans up our lavalier recordings easily. I also like the USB backup so I don’t need to pop-out the SD card and we have a backup.
(OLD WE NO LONGER USE THIS) The Zoom H6 recorder is one of the best there is. It accepts XLR and has dials for individual inputs. I’ve used the XLR inputs for all

kinds of things like plugging in a BEHRINGER XENYX X2222USB![]() Mixer when we had 10 people on episode 105 at the barrel pick and even taking a Line-level input when recording at the Kentucky Derby Museum. The extensibility is great by having it capture X/Y audio when you need room sound, but to be honest, it doesn’t get used much. If you plan on having more than 4 guests consistently, you can splurge and buy the Zoom EXH-6 Dual XLR/TRS Capsule
Mixer when we had 10 people on episode 105 at the barrel pick and even taking a Line-level input when recording at the Kentucky Derby Museum. The extensibility is great by having it capture X/Y audio when you need room sound, but to be honest, it doesn’t get used much. If you plan on having more than 4 guests consistently, you can splurge and buy the Zoom EXH-6 Dual XLR/TRS Capsule![]() that gives you 2 more XLR inputs. The interface has all sorts of controls for doing audio magic, but to be honest, I never use any of it. The only things I do are start recording, stop recording and format. That’s all.
that gives you 2 more XLR inputs. The interface has all sorts of controls for doing audio magic, but to be honest, I never use any of it. The only things I do are start recording, stop recording and format. That’s all.

(OLD WE NO LONGER USE THESE) The Audio-Technica ATR2100-USB is awesome because you have multiple functions. It’s a great Cardioid microphone for standard interviews using the XLR input, but when it comes time to doing remote interviews, you can use the USB for recording on your computer. Don’t skimp out on microphone quality, seriously. If you only have a need for XLR and you’re on a budget, you can also take a look at Behringer Ultravoice Xm8500 Dynamic Vocal Microphone, Cardioid![]() . This has some really good reviews and for $20 it’s hard to beat at the price. We now use these microphones to ship to guests for them to use so we have the best possible audio. Don’t forget, you need wind screens. These cheap On Stage Foam Ball-Type Mic Windscreen ones do the trick. This helps drown out the noise of heavy breathers or people who stick their face to close to the mic and have loud Ps that pop. It doesn’t do the job of a good Pop filter, but it works for a travel unit.
. This has some really good reviews and for $20 it’s hard to beat at the price. We now use these microphones to ship to guests for them to use so we have the best possible audio. Don’t forget, you need wind screens. These cheap On Stage Foam Ball-Type Mic Windscreen ones do the trick. This helps drown out the noise of heavy breathers or people who stick their face to close to the mic and have loud Ps that pop. It doesn’t do the job of a good Pop filter, but it works for a travel unit.
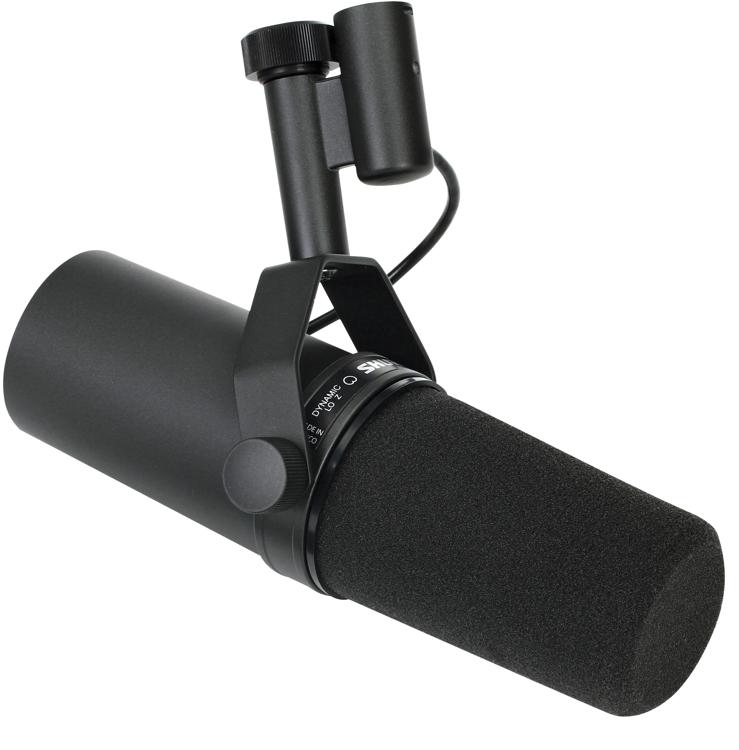
Shure Sm7b is by far the best of the best. It’s the music and audio industry go to microphone with classic sound and performance. It’s expensive at $400 per microphone (we have 4 of them), but that’s just where the $$ gets started. You won’t find anything except 5 star reviews on this microphone and it shows.
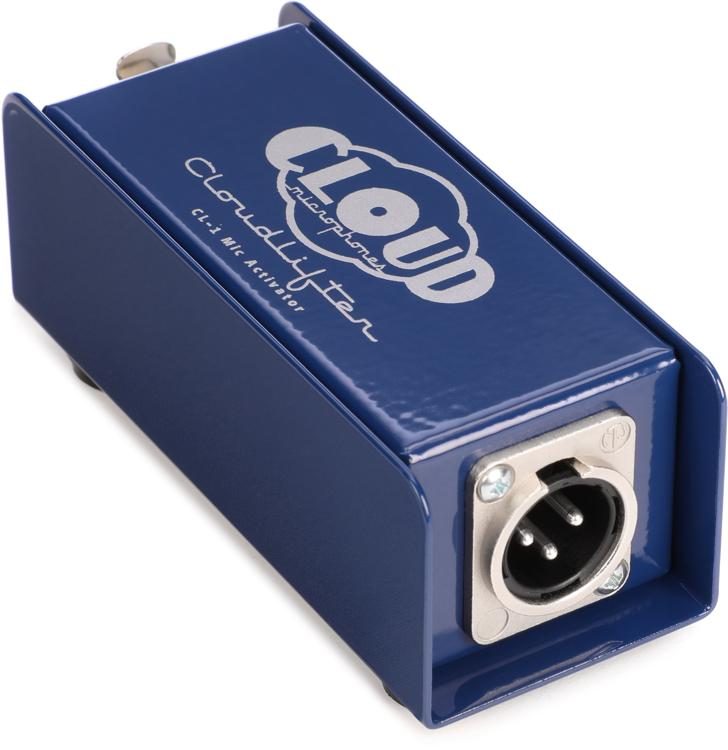
(NO LONGER NEEDED WITH MIXPRE) In addition to the Shure SM7b, it’s recommended to get a Cloudlifter. There are a few different variations with inputs but we have one cloudlifter per microphone. This will give you a boost of +25dB of clean sound. You need this for podcasting or you will get a bunch of digital noise when using the pre-amp on the Zoom H6
![]()
Boom Scissor Arms come in lots of price ranges. Find one that works for you.
Whenever we can’t use our scissor boom arms because of table thickness, we use these stands. These Hamilton Nu-Era Tabletop Mic Stand![]() s are cheap enough and do the trick. They are great quality and have variable height settings. Oddly enough, I use the bags for storing all the extra cables and haven’t found a need for the mic clip yet.
s are cheap enough and do the trick. They are great quality and have variable height settings. Oddly enough, I use the bags for storing all the extra cables and haven’t found a need for the mic clip yet.![]()
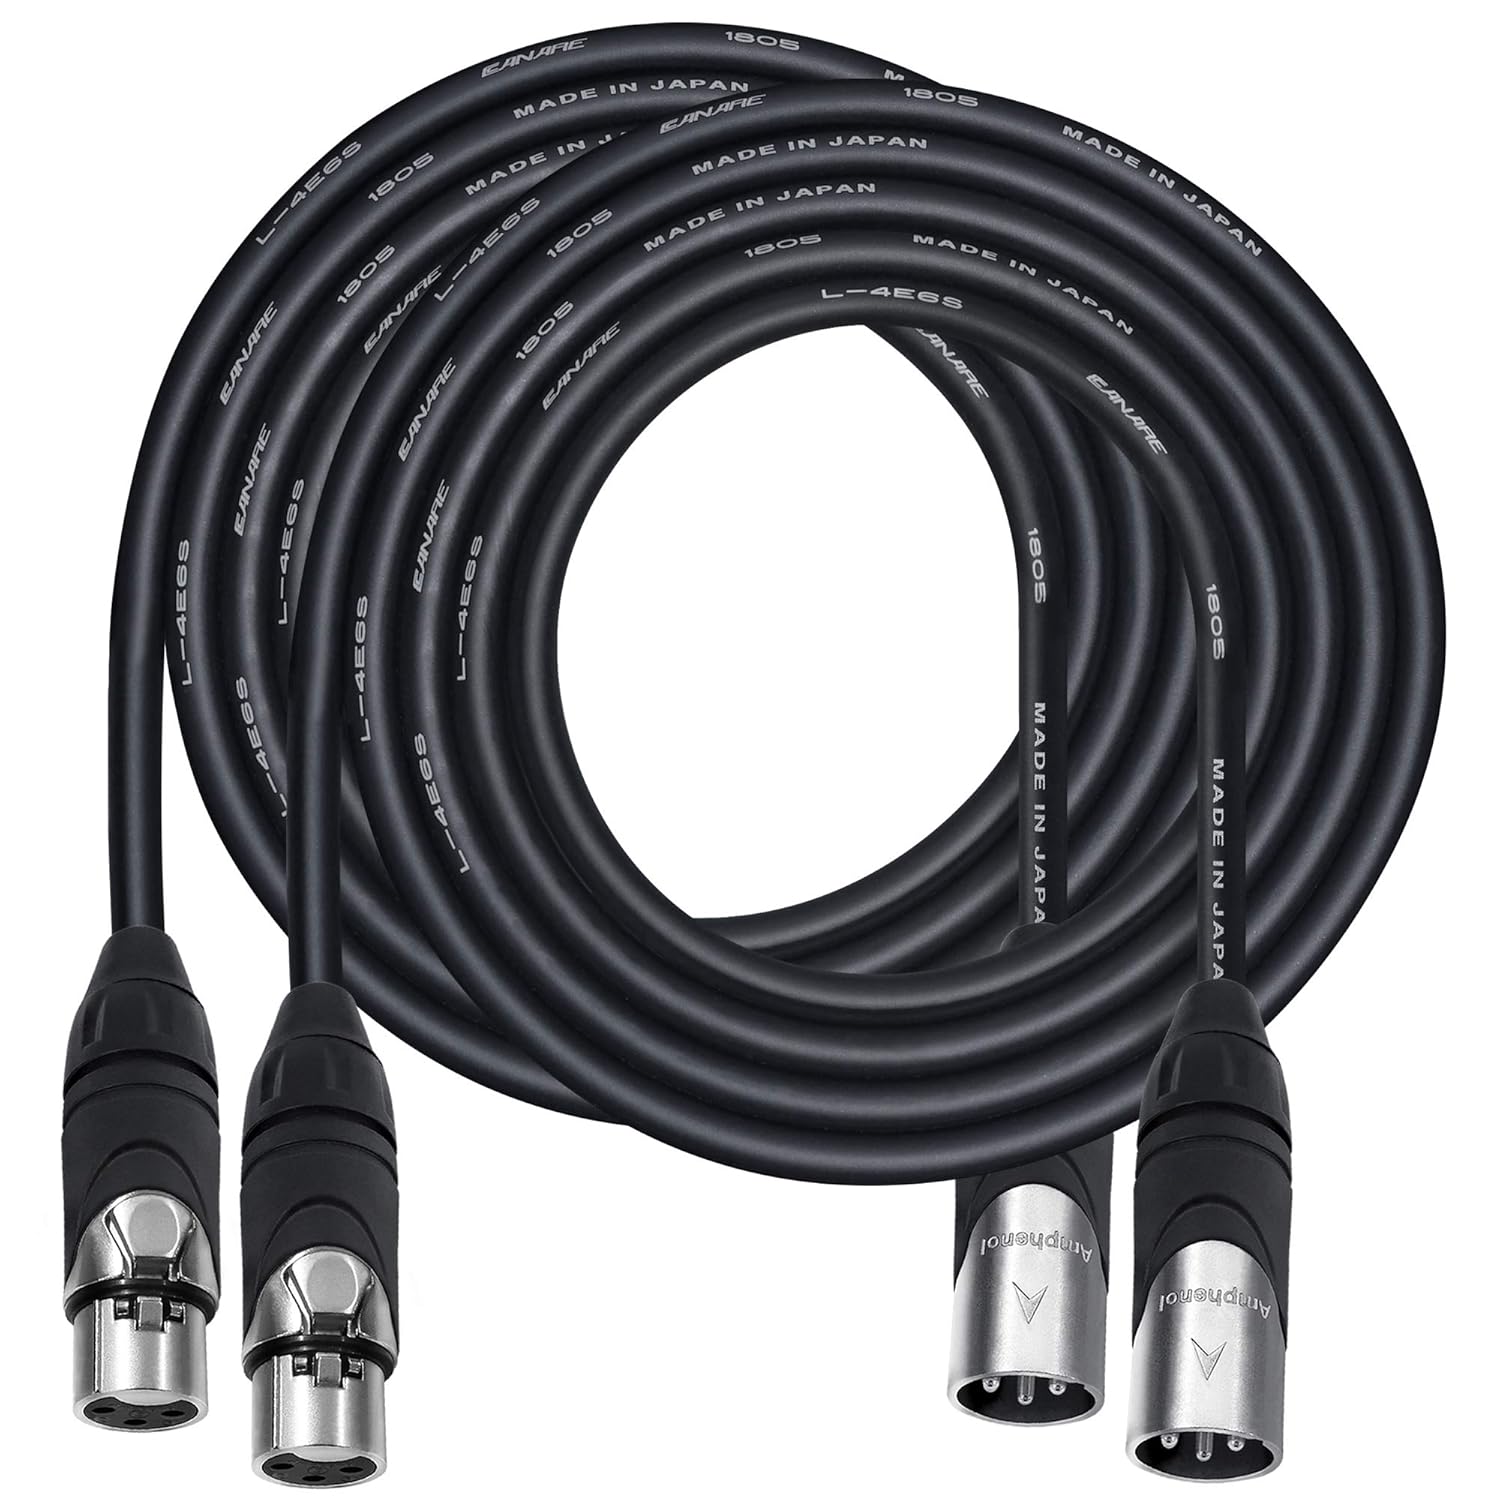 Don’t cheap out on XLR cables. Cheap ones will be prone to electrical interference and bad connections. These aren’t as highly rated as Mogami (industry best) but these Canare L-4E6S, Star Quad Balanced Male to Female Microphone Cables with Amphenol AX3M & AX3F Silver XLR Connectors have worked well for our equipment. We bought a few in different lengths for variability.
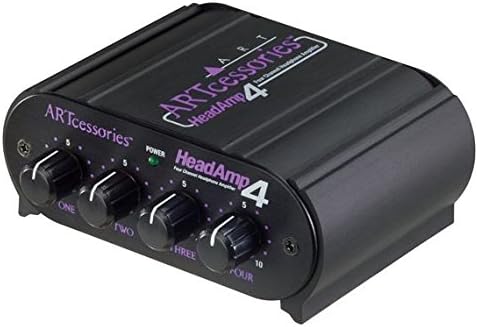 Part of getting the best audio is making sure the guests can hear themselves. If they aren’t, you will find out they are not close enough to the microphone and it will be even more work to accomplish in post. The ART HeadAMP4 Eight Output Stereo Headphone Amplifier will take a the headphone output from the Zoom H6 and allow you to connect up to 8 headphones for use. Everyone can hear themselves now.
 Speaking of headphones, I did a lot of research to find the right headphones. I was searching for an affordable solution that provided three key factors: Comfort, Clarity, and Compactness. The comfort factor was the most important because if you are going to have a few of your guests wearing these for an hour, they need to feel like nothing is there. Clarity for the quality of the sound and to make sure your guests hear themselves clearly. Compactness for a podcast that has to go to multiple places. The JVC HARX500 met 2 of the 3 conditions I felt were the most important, comfort and clarity. After putting on these headphones, I just felt like I could easily have them on for hours without any worry of fatigue or my ears hurting. The sound coming from the speakers was true to self and was great for the price point. As mentioned above, it still allows some ambient noise to penetrate so you can hear background noise and isn’t completely noise isolation which I needed. These fail the compact use case but they are still slimmer in profile. The 8′ wire has come in very helpful for navigating around tables.

![]() You will want a 32GB or larger SD Card for recording from Zoom H6. We use Sandisk Ultra 64 GB – MicroSDXC UHS-I (SDSQUNC-064G-AN6IA)
You will want a 32GB or larger SD Card for recording from Zoom H6. We use Sandisk Ultra 64 GB – MicroSDXC UHS-I (SDSQUNC-064G-AN6IA)![]() and this gives us hundred of hours of audio. The Zoom H6 records with .wav files so if you’re talking for an hour with 4 channels and then mix them down into one, you’re pushing the limits of about 4-6GB of data right there. With how cheap these things are getting, might as well go big and never have to worry about running out of space.
and this gives us hundred of hours of audio. The Zoom H6 records with .wav files so if you’re talking for an hour with 4 channels and then mix them down into one, you’re pushing the limits of about 4-6GB of data right there. With how cheap these things are getting, might as well go big and never have to worry about running out of space.
Video Recording Equipment
- Panasonic G85 – $650
- DMW-DCC8 DC Coupler USB Power Adapter – $25
- SanDisk 128GB Extreme PRO SDXC UHS-I Card – $40
- Rokinon Cine CV12M-MFT 12mm T2.2 Cine Fixed Lens – $300 (OLD NO LONGER USED)
- Olympus M.Zuiko Digital ED 12-40mm f/2.8 PRO Lens – $850
- GEEKOTO 77” Tripod – $80
- GVM 560 LED Video Light – $200
- 2x D-Fuse DF-1M Collapsible Universal Softbox – $35
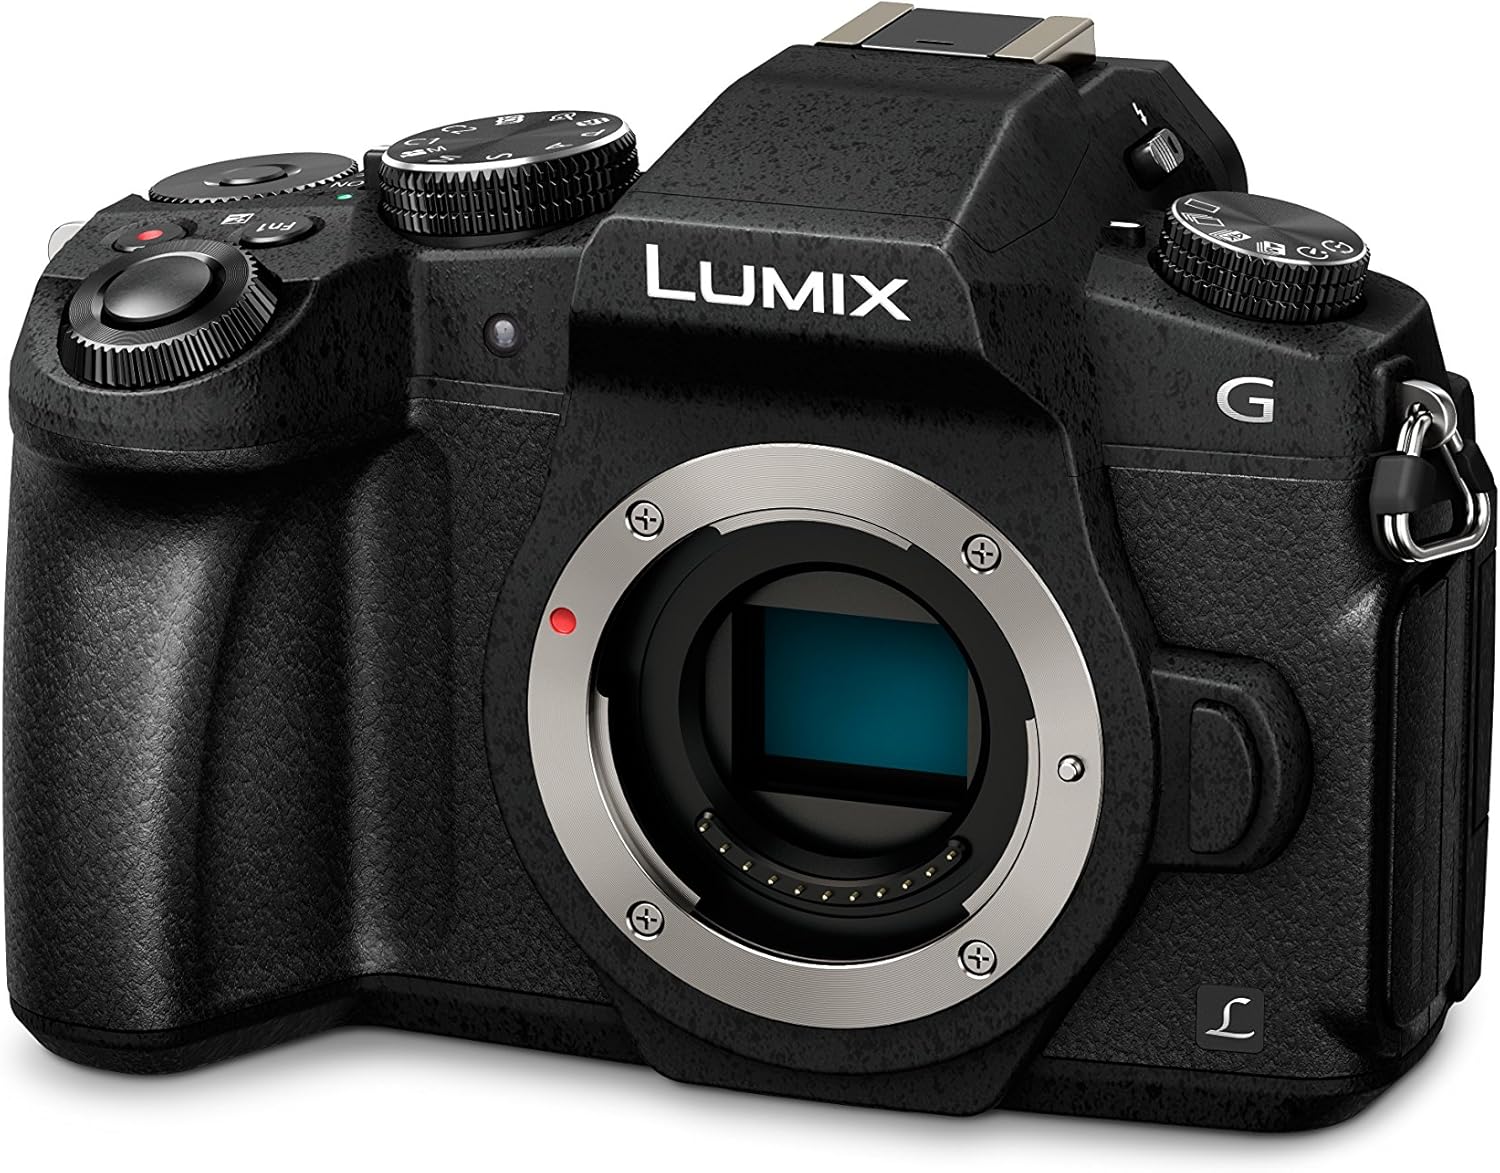 We’ve upgraded from our GoPro to a full DSLR solution. We needed this for our Whiskey Quickie series so we could have great YouTube quality. I chose the Panasonic G85 because it can record 1080p and 4K continuously. Canon, Nikon and other brands fail at this and have a 29 minute timer. It’s a long story why, but the Panasonic gets around this limitation and it can record for hours. Jumping from a GoPro with no fiddling of settings to a full blown DSLR where we have to worry about white balance had learning hurdles. There’s so many settings and it’s taken a long time to get them dialed in properly. Consult an expert in cameras before you go this route.
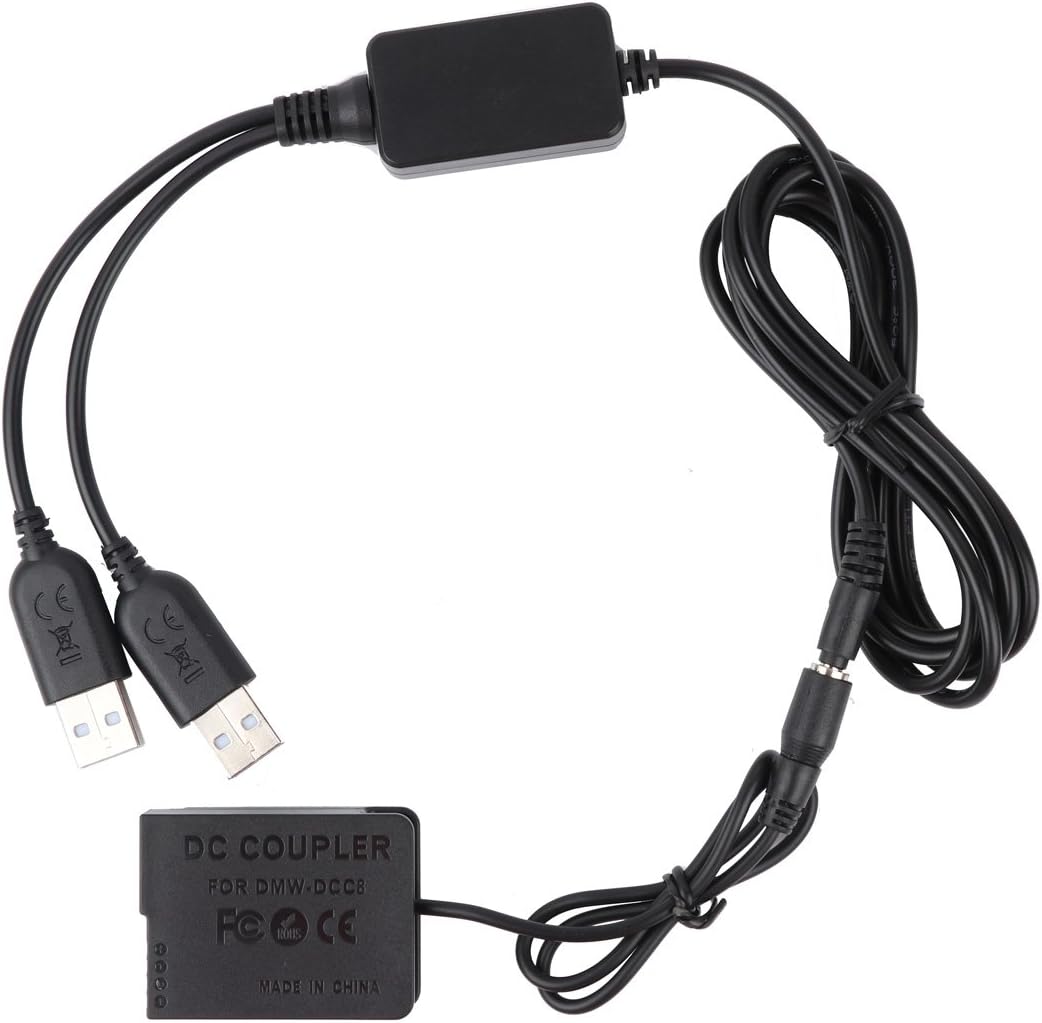
For continuous recording, you will need a dummy battery for the camera.
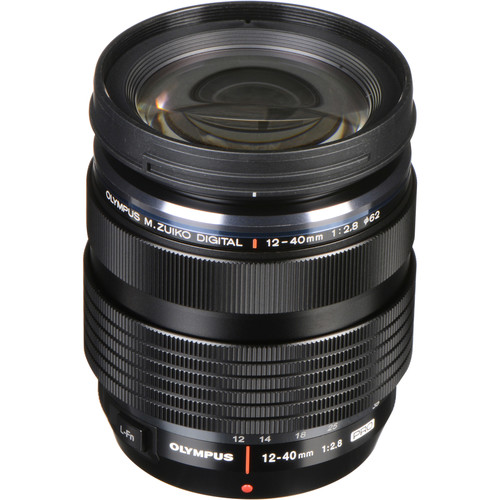 The lens was the next challenge. We had been using the Rokinon 12mm T2.2 Cine Lens for a while but I’m not sure it was the right choice. 12MM is a good length and this lens does really well in dimly lit areas. But it lacks crispness when you have to pull the camera far back. We upgraded to an Olympus M.Zuiko Digital ED 12-40mm f/2.8 PRO Lens. So far this lens has performed really well since it autofocuses and makes life much easier. Very much worth the investment.
We upgraded our Tripod to something with a ball head and can also be super compact but also extend very high. The Geekoto 77″ has worked very well for us even though it’s not a super professional tripod.
 Lastly, anytime you are recording video in dimly lit areas… or even indoors where there isn’t natural light, it’s always good to have lighting. This is why we invest in a few lights to use for our Whiskey Quickie series. We also wanted to soften the light so we added 2x D-Fuse DF-1M Collapsible Universal Softbox.
Video Recording Equipment (OLD. We No Longer Use GoPro)
- GoPro Hero 8 – $499
- 64GB or larger SD Card rated at >90mb/sec Write – We use SanDisk Extreme PLUS 128GB microSDXC UHS-I Card – SDSQXBG-128G-GN6MA – $99
- GoPro Pro 3.5mm Mic Adapter – $49
- 3.5mm Male to Male Stereo Aux Cable from Line Out of Zoom H6 to Line In of GoPro – $7
- Lightweight Tripod ($25-$50) with Smatree Aluminum Tripod Mount Adapter for GoPro ($7) or GoPro 3-Way Grip, Arm, Tripod ($69)

![]()
As I had mentioned earlier, we are unique that we also record video. Honestly, it’s not much extra effort to record video and it gives you much better presence on Facebook and you can even publish to YouTube for more subscribers. When we were looking into video, I didn’t want something super expensive and I didn’t want something big that I had to lug around. I wanted it to be easy enough that we can take anywhere, use in a pinch, have decent-good but not AWESOME video quality. That’s when Ryan suggested to use a GoPro. After doing some research, the newer GoPros do well in low-light but really shine in the day time. Don’t expect to create killer quality but for the price and form factor, The GoPro Hero 5 worked well for us and the new GoPro HERO6 Black just launched.

If you start reading on forums, you will see that anyone that has problem with a GoPro is because of their SD card. Buy the correct card and you won’t have problems. We use a SanDisk Extreme PLUS 128GB microSDXC UHS-I Card – SDSQXBG-128G-GN6MA![]() . We went big because the last thing I want to happen is be somewhere recording multiple episodes and run out of space. It’s easier to keep it all on one card. Also, 128GB means it can store almost 83,000 pictures when it’s clean and near 8 hours of footage @ 1080p 30FPS.
. We went big because the last thing I want to happen is be somewhere recording multiple episodes and run out of space. It’s easier to keep it all on one card. Also, 128GB means it can store almost 83,000 pictures when it’s clean and near 8 hours of footage @ 1080p 30FPS.![]()

![]() Of course, getting audio from the Zoom H6 to the GoPro is going to require a special piece of equipment. The GoPro Pro 3.5mm Mic Adapter
Of course, getting audio from the Zoom H6 to the GoPro is going to require a special piece of equipment. The GoPro Pro 3.5mm Mic Adapter![]() is the only thing that fits the bill and there is no 3rd party adapter. Many vloggers complain that it’s too bit, but it doesn’t bother me for my purposes. Not only that, you can still plug in your AC Adapter to USB-C and have full power connectivity so you won’t be reliant on battery power. You also might be wondering why am I recording audio on both the Zoom H6 and the GoPro. Well, just wait until you go to record an interview and something messes up or a SD card becomes corrupt and you lose the interview. It’s a sinking feeling. That’s why we have redundancy built in so audio is being recorded in two places.
is the only thing that fits the bill and there is no 3rd party adapter. Many vloggers complain that it’s too bit, but it doesn’t bother me for my purposes. Not only that, you can still plug in your AC Adapter to USB-C and have full power connectivity so you won’t be reliant on battery power. You also might be wondering why am I recording audio on both the Zoom H6 and the GoPro. Well, just wait until you go to record an interview and something messes up or a SD card becomes corrupt and you lose the interview. It’s a sinking feeling. That’s why we have redundancy built in so audio is being recorded in two places.

A standard male-to-male audio cable is also required to go from the Zoom H6 to the GoPro. You probably have these laying around, but I have a few different lengths in my case for different settings. Sometimes you need 3.5mm Male to Male Stereo Aux Cable![]() , sometimes you need 6 inches. Depends on how you are recording.
, sometimes you need 6 inches. Depends on how you are recording.![]()


![]() The GoPro needs to have a stable surface and we’ve chosen to ways to make that happen. For table top use (which is 75% of the time), the GoPro 3-Way Grip, Arm, Tripod
The GoPro needs to have a stable surface and we’ve chosen to ways to make that happen. For table top use (which is 75% of the time), the GoPro 3-Way Grip, Arm, Tripod![]() does the trick. It works as a tripod, selfie stick, and hand grip. There are also times when you need a Lightweight Tripod
does the trick. It works as a tripod, selfie stick, and hand grip. There are also times when you need a Lightweight Tripod![]() for your GoPro. So get one that is height adjustable. The bottom of the Zoom H6 has a threaded bottom, so it can be mounted to a tripod for standing interviews which is nice.
for your GoPro. So get one that is height adjustable. The bottom of the Zoom H6 has a threaded bottom, so it can be mounted to a tripod for standing interviews which is nice.![]()
I’ve made the mistake before buying cheap GoPro accessories. Don’t do it. Buy GoPro branded ones or high quality ones. The three I can recommend are the:
- GoPro Chesty for getting some interesting first person footage
- GoPro Handlebar Seatpost Mount which can be mounted to the extension pole of a tripod for your GoPro which leaves room to mount the Zoom H6 on the Tripod screw. This setup was used for filming at expos.
- A metal tripod mount. The plastic ones will break if screwed too tight. I’ve used<Smatree Aluminum Tripod Mount Adapter for GoPro with great success

![]()

![]()

![]()
Mobile Audio/Video, B-Roll, Extra Footage, and Facebook Live
- Use the GoPro with a stick/GoPro 3-Way
- Rode VideoMic Pro Compact Shotgun Microphone with Deadcat VMP Furry Wind Cover – $229.00
- Eynpire Triple Mount Hot Shoe V Mount Bracket – $9.95
- Smartphone with a Rode SC4 TRS-to-TRRS Adapter for audio and Grip Kit with Cold Shoe Mount
Sometimes you may need to get B-Roll footage or perhaps you need to record quickly on the go. This is also used for doing Facebook Live footage. I contemplated many times getting a nice gimbal like Feiyu G5 3 Axis Gimbal![]() but the more I read about them, the stabilization is great for footage but not my need of also having good audio. It seems to be a big trade off. So I haven’t made the purchase on a gimbal yet but will update if I do.
but the more I read about them, the stabilization is great for footage but not my need of also having good audio. It seems to be a big trade off. So I haven’t made the purchase on a gimbal yet but will update if I do.

![]() So you already have a GoPro Stick or a GoPro 3-Way at this point, how do you make it mobile with great audio? This is where the Rode VideoMic Pro
So you already have a GoPro Stick or a GoPro 3-Way at this point, how do you make it mobile with great audio? This is where the Rode VideoMic Pro![]() comes in. It’s a shotgun style microphone that picks up great audio. There is also a great cat cover that comes with it for wind reduction and it truly does work.
comes in. It’s a shotgun style microphone that picks up great audio. There is also a great cat cover that comes with it for wind reduction and it truly does work.

Now here’s the crappy part, if you are filming your GoPro in any mode other than Narrow, you are going to see the Rode VideoMic Pro in the field of view when it’s mounted on the cold shoe of your SHOOT case. To mitigate this, it needs to be just another inch higher and the best thing I’ve found is the Eynpire Triple Mount Hot Shoe V Mount Bracket.![]()

So you want to be cool and use Facebook Live! Going Live gets you put to the top of a Facebook newsfeed so it’s a great way to be in front of your fans. The GoPro doesn’t have the capabilties so you need to rely on your phone, there are a few different grips that have cold-shoe adapters like the Aoonar Smartphone Grip Handle![]() ($18) or a more stable two hand system like Neewer Smartphone Video Rig
($18) or a more stable two hand system like Neewer Smartphone Video Rig![]() ($15).
($15).![]() This allows you to use your Rode VideoMic Pro but you still need one more critical piece. The Rode SC4 TRS-to-TRRS Adapter
This allows you to use your Rode VideoMic Pro but you still need one more critical piece. The Rode SC4 TRS-to-TRRS Adapter![]() ($15) is designed to allow microphones with a 3.5mm output to connect to TRRS smartphones and tablets.
($15) is designed to allow microphones with a 3.5mm output to connect to TRRS smartphones and tablets.
Remote Recording Equipment
- Shure MV7 or Audio-Technica ATR2100-USB
- Ear Buds to remove any sound coming from speakers picking up in microphone
- Riverside.FM
If you’ve already made an investment in the Audio-Technica ATR2100-USB then no worries, you can continue to use that for your remote interviews. If you have invested in the ZoomH6, Shure Sm7b, cloudlifter, etc you can use the Zoom H6 as an audio interface and you can get that same great sound in your remote interviews. Another great option is the Shure MV7 that is made for podcasting. Great Shure quality with both USB and XLR interfaces.
We use Riverside.FM for our remote recording platform. It’s $40/month but the quality is great and we get video too. For Bourbon Community Roundtables we are using StreamYard.
Always use headphones when recording and do not rely on sound coming out of your computer to kill any chance of a feedback loop.
Post Production Software
If you are doing it on your own, Auphonic to take your multi-track WAV file from a Zoom H6 or MixPre and make sure the audio levels sound even. Auphonic even has other valuable features such as denoising.
If you’re like us, then it’s time to move all the media into Adobe Premiere or Audition and begin the cutting and editing magic. Sync the video and level audio together. From there begin editing everything together. Adobe Premiere is not a simple program to use, but I had a great teacher that showed me the basics. Lauren is our editor now and she spends many hours per podcast mastering audio in Adobe Audition to remove clicks, esses, hums, digital noise, etc. It takes a lot of time to produce one hour of solid audio.
No matter which method you use to cut your files, I always export my MP3 using 192kbps.
We use Auphonic for This Week in Bourbon along with Adobe Audition.
We outsource our Thursday episodes to Resonate Recordings because they are true masters of audio engineering.
Publishing
- LibSyn Podcast Hosting Advanced @ $20/month (beginners)
- Megaphone.fm (current hosting ~$250-$300/month)
LibSyn has become one of the leading podcast syndicates to host your podcast. The interface is simple (a bit archaic) but gets the job done. It does everything you need for publishing to multiple endpoints including iTunes, Google Play, and even to WordPress or YouTube.
Of course, your podcast probably has a blog or your using a blogging platform like WordPress. LibSyn has a greatWordPress Plugin that will take the WordPress post information and turn it into your podcast for the title, show notes, scheduled released, and more. This has streamlined our process more and we don’t even touch the LibSyn website anymore which is great.
Today we have moved our hosting platform to Megaphone.FM to use dynamic based ad insertion. If you plan on needing a monetization strategy, I found Megaphone worked great for our use case. You will likely need ~100k downloads per month to make it worth your while.
Well that’s the information you need to get started. It’s not all the process and how-tos of editing but it’s a great start.