Setting up the GoPro and ZoomH6 for Recording
Tip #1. Always have an extension cord in your car. That’s the only thing not in the cases for recording
The first thing to do is figure out where you are going to record and the height needed for the camera. This determines whether the GoPro needs to be mounted on the a tripod or use the 3-way attachement.
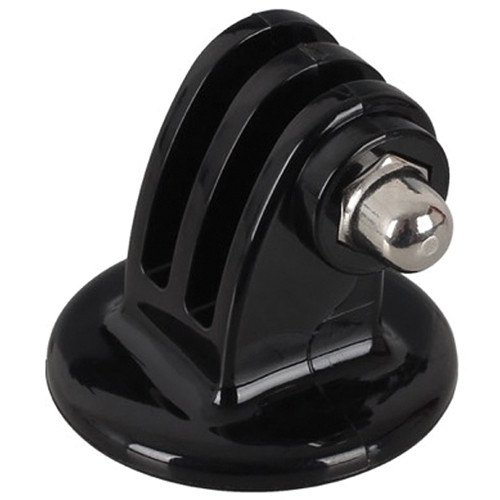
If it’s on a desk, unscrew the bottom of the 3-way, and flip around the tripod piece and screw it back in. Change the 3-way arm so it’s evenly balanced. With the new metal case, the camera is a bit heavier and needs to be just a little bit forward.

If you are going to use the tripod, get the tripod attachment out. Take the camera with the metal case and screw it on the attachment. Secure the attachment to the tripod
On the side of the gopro is a slider where there is a USB-C connection. Slide the door down to expose the connection. Attach the GoPro USB-C Microphone adapter.
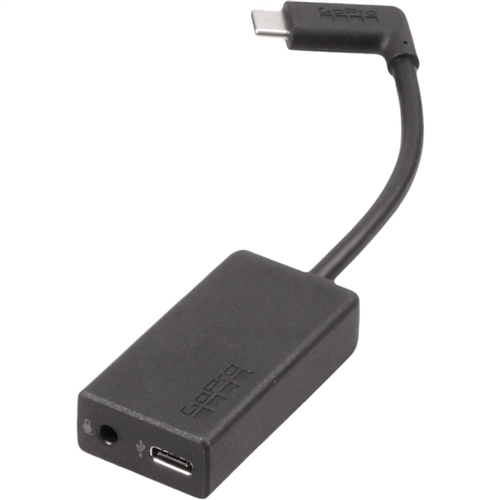
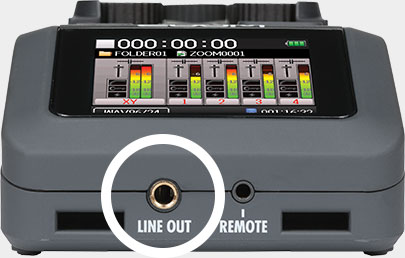
Get out the Zoom H6 and place it in front of you where you can control the dials. Connect the XLR microphones to inputs 1 through 4. In the black zipper bag is a 10’ standard audio cable. Connect that from the bottom of the ZoomH6 Line Out to the GoPro Microphone Adapter.
For continuous power and not relying on batteries, plug the 2-outlet surge protector into an extension cable and place it on the table near the equipment. Use the Black USB Power Adapter and connect the the black Micro-USB cable from there to the ZoomH6. Use the White Apple Power Adapter with the black threaded USB-C cable to the GoPro Microphone Adapter USB-C connection.
Powering On:
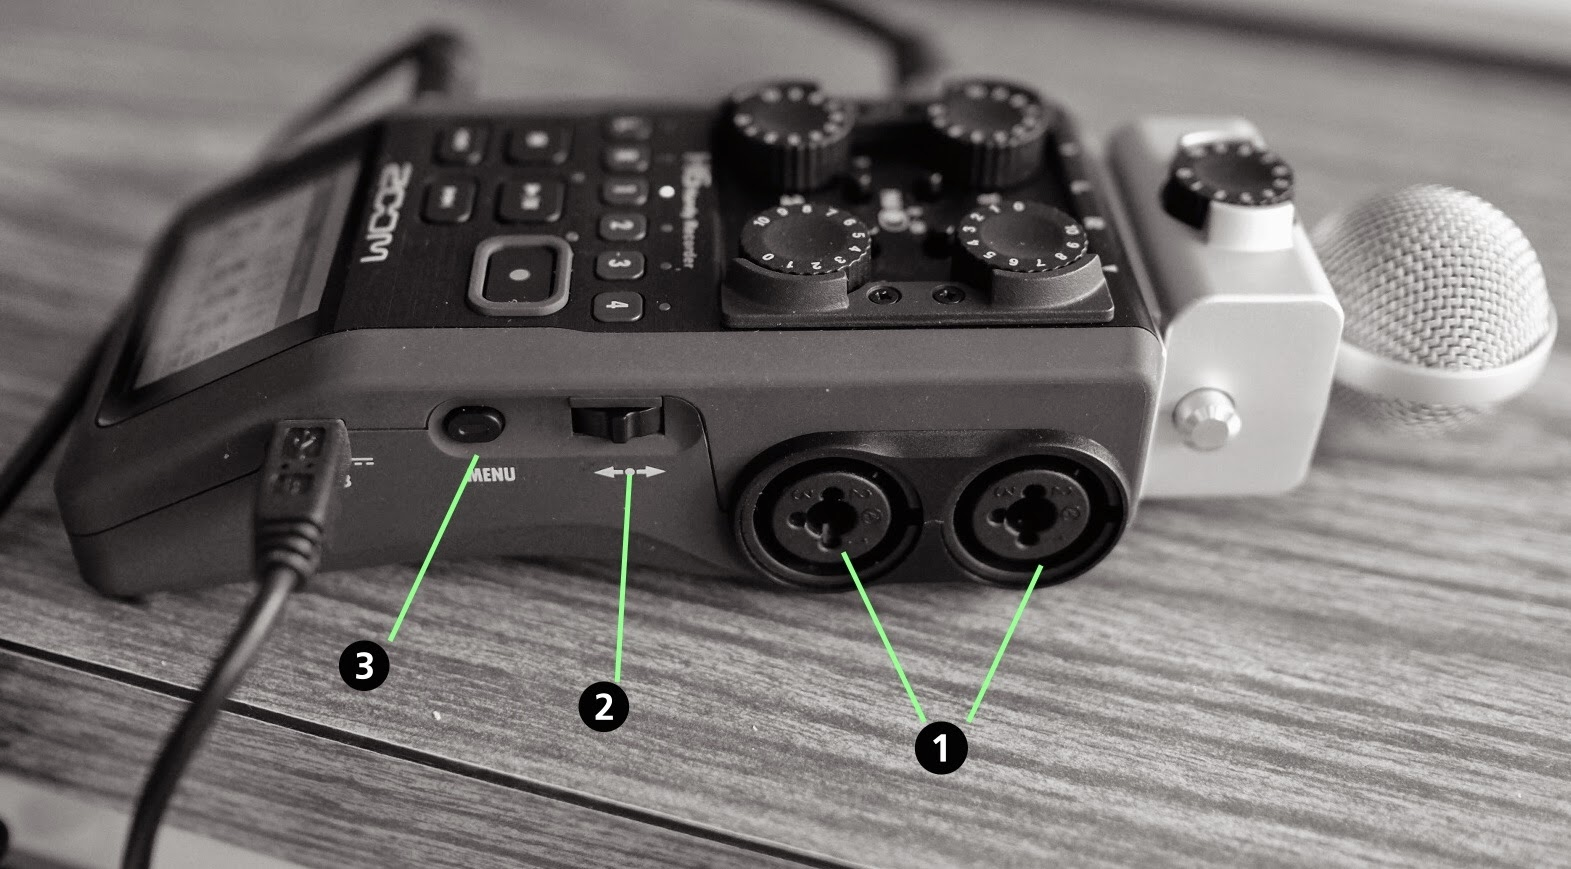
Make sure to power on the ZoomH6 first. Slide the button on the left hand side down and hold it for 1 second then release.
Once Power to the ZoomH6 is fine, then power on the GoPro. Hold down the side button for 1-3 seconds and you will hear 3 beeps.
Verify the GoPro is ready for recording. Swipe Down on the screen and go to Preferences:
- Turn off Voice Controls (this is what made the video stop recording at random times)
- Turn off WiFi and GPS (hasn’t been tested but being turned off has not shown any problems. Need to test with these back on)
- On the Audio Input, it needs to say LINE IN. If LINE IN isn’t automatically selected, turn off the GoPro, reseat the USB-C dongle and turn it on again. Then check once more
- Go to the VIDEO screen and make sure the video is set on 1080p at 30FPS. The 30FPS is very important when it comes to post editing
- Set the angle to LINEAR
- Press the record button to start recording.
On the ZoomH6, use the button on the right side to scroll and select.
Click the menu button
If it hasn’t been done already, format the SD Card to clear it all out. And if there is every any problem with it, just format the SD card.
1. Press Menu button
2. Using the scroll wheel, highlight SD card and then press Down to select it.
3. Highlight Format and press Down to select it.
4. When prompted to format SD Card, highlight Yes and press Down to begin formatting the SD Card.
At this point, Folder 1 is a default, you can choose another folder if we are doing multiple recordings. Select Folder 1, then hit the record button on the ZoomH6 to get back to the audio recording screen.
Make sure all the connected microphones have a red light. This means they are on. Press the buttons 1, 2, 3, or 4 to activate or deactivate a channel. The LR isn’t used unless you have an attachment on the Zoom.

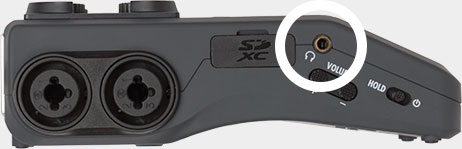
Plug your headphones into side. There are ear buds in a little black velvet bag.
Press Record on the Zoom
Check audio levels and make sure when people are talking that they are not in the red. The should be in the high green low yellow range.
Finish Recording.
Press the STOP button on the ZoomH6 to stop the recording. It will take 2-3 seconds for it to do its thing. Once that is done press the top right button on the gopro to stop recrording there. Disassemble everything and put back in cases.